Saturday, 19 June 2021

Chonk Rocket! Build and First Flight


Pre Covid I was mentoring a school team towards taking part in a UK rocketry competition and I'd bought a few bits and pieces on their behalf. Some estes BT80 body tubes, a matching nosecone and some F36 cti motors. Of course Covid scuppered the team and I had these bits sat here looking at me, so I decided to build something. I'd never really designed and built something for the upper end of mid power, I have models that I've designed up to D on 24mm diameter motors and then the bigger HPR stuff. I also realised that a simple reasonably wide airframe mid power rocket is an excellent test vehicle for testing DIY parachute designs and getting a bit of data.


"Chonk" Is quite a straightforward build in essence, I CNC'd some centering rings and CNC'd the through the wall fins. I decided to put a fine layer of fibreglass on the rings but I haven't glassed the fins. I find through wall fins make a very strong fin can and as such I felt with everything stuck to the 29mm phenolic motor mount tube that it was all going to hold together.  Despite being a simple single deploy airframe I wanted to get flight data, where possible, to make it a decent test platform so I performed extensive butchery  modification to the off the shelf NC80b nosecone. 


I used the bandsaw to take off the base of the nosecone and then installed a 2mm threaded rod by pouring around 10mm depth of laminating epoxy into the nosecone tip. I left a nut on the threaded rod in the epoxy to act as a decent anchor. I also CNC'd a plywood ring to sit in the lip of the shoulder and receive the closing bulkhead and later I added a couple of M2 nuts and bolts to further hold the bulkhead and NC all together. I then made a bulkhead with a simple soft retainer and reinforced the bulkhead with fibreglass and a wooden centre washer. Inside the bulkhead I installed some uprights around the threaded bar area and installed 2 altimeters, a perfectflite Alt15 and an Eggtimer Quark the latter of which I had wired up to an openlog board for it to write flight data to an SD card. 


To arm the altimeters I used the CNC screw switches which I designed and built quite some time ago, they worked flawlessly and maintained continuity throughout the flight. As the nosecone is quite heavy it's gets some decent loads/forces on ejection and deployment so it was a good test. A couple more test flights with this design and I might be tempted to make a few and stick them on tindie to sell.  


Chonk flew last weekend in great conditions at Midland Rocketry Club and I'd made a 60cm 10 gore annular chute to fly in it. Chonk was probably slightly over chuted but a very steady and stable descent was made and I do like how people watching react to the annular chutes as they aren't a common sight at UK rocketry events yet! I reduced the delay to 7 seconds, but definitely it was a little late (even better test for the screwswitches!) and if I fly in this configuration again I'd take the ejection delay down to 6 seconds. 

One of the best things that happened at the event was a fantastic rocketeer and accomplished modeller Pete turned up with a downscale micro version of "Chonk"! He'd seen me making Chonk on twitter and decided to make one using a micromaxx 6mm motor! Such good fun and his Micro Chonk flew very well! 


Tuesday, 25 May 2021

M-Sure 150mm Digital Caliper

A while ago I was sent a set of Moore and Wright Dial Calipers for review for Hackspace Magazine. The company that sent them over was Machine DRO who I'd bought off previously (an excellent digital height gauge still in regular use). I remember at the time one of the members of staff saying that they were working on an in house range of measuring and metrology kit. I spotted the other week that their in house M-Sure range had been launched and quite fancied the look of the digital calipers, my current cheapo set (one in a long line of cheap digital sets) having just died!  Priced at £28 I ordered a set of the 150mm. 
Dispatched quickly they soon arrived well packed with the calipers themselves in the case inside a plastic bag with some protection waxed paper in between the precision ground jaws. A desiccant bag also was added to make sure their was no moisture. Also in the case is a small plastic tool for opening the battery cover, although it's fair to say a coin would do the job if this went missing. I couldn't spot a CR2032 inside the case and was about to start muttering and wading through my draws to find one but I then realised the battery was in the rest of the packaging along with a instruction manual should you need it!

I was pleased to see a small O ring seal in the battery compartment, but do be warned that this isn't fixed in place and sits rather loosely in the groove so can fall out when the cover is removed. The display had a clear plastic film over it but once removed the display is clear and crisp and the refresh rate is very fast, certainly faster than the cheaper calipers I have used. Note in the picture below that there is a seal over the USB connector. If I were to make one of two small complaints it's that the left hand side of this cover sticks up where there is a plug that retains this seal when the USB slot is uncovered. Whilst none of the seals claim to be waterproof it was a bit annoying that the addition of a seal had in fact created a little area for chips/dust/moisture ingress into the case. 


In use the calipers are a very nice experience, the movement is smooth all the way up the scale and is still pleasant up towards the 150mm end. Again I have had calipers that get either floppy and loose or grindingly stiff at the far end of the scale so these are excellent in that respect. 


Under the USB seal is a Micro B USB connector. Data output is common across some of the M-Sure range which includes Digital Micrometers, Dial Test Indicators, Height Gauges, Bore gauges and more. There are some generic "linear gauges" I have my eye on as a potential DRO system for a small milling machine. I haven't tried the data output function on these calipers yet but I'll feedback when I have. Note that some other instruments in the M-Sure range need an additional add on USB interface to enable data capture and there are also extra remote displays available for some devices in the M-Sure range. 

My second small complaint, that really shouldn't detract from an otherwise excellent set of calipers, is that they have some marks and staining presumably from the manufacturing process, most noticeable on my set is a stain under where the PCB sits when the calipers are closed. This is not an issue for me at all, they will be filthy after some time on my desk, in my bag and in the shed, but it's important to mention. The aren't advertised as clean room specified but just in case someone buys them and opens them in their high end metrology lab!

My two little niggles aside these are an excellent buy at a great price. I've always had good customer service from Machine DRO and they were a pleasure to work with a while ago writing up the Hackspace article. 


Thursday, 13 May 2021

Vinyl Cut your own Perseverance Rover Fiducial Markers.


Image Credit NASA/JPL Caltech

I've been doing some writing recently that had me looking a lot at pictures of the Perseverance Rover currently carrying out fantastic science on Mars. Whilst writing on this other project I got mildy obsessed with the appearance of some of the fiducial markers that are on the rover's body panels. These markers are used by either machine vision systems or by analysts back on earth to check dimensions and distances and to calibrate sensors accordingly. 

I decided I wanted to make some of my own, they's look cool on a rocket and could be used as a roll pattern, but equally they just look cool on my toolboxes etc! They are a simple design that I put together in Inkscape and I've uploaded the project files to Thingiverse. If you have access to a vinyl cutter then these are pretty straightforward to cut and layup. 


Tuesday, 6 April 2021

Repairing the best worst extractor lamp!


Not sure if this is a blogpost or just a cautionary tale, but anyway DON'T BUY THIS SOLDERING EXTRACTOR LAMP! With that said... here is my tale. I wanted a small solder extractor and I saw these extractors built into a angled lamp, running off USB power they peaked my interest and I handed over £40 for one online.  On arrival I unpacked it and put it into use, it was OK, not the strongest extractor by any standards but my solder area is under a Velux window and it has enough of a draw to move the solder fumes away from me and out of the window. On the cable to the USB plug it had a controller with 4 momentary press buttons on it, you could switch between 3 "colours" of LED lamp, all shades of white, one a "cool white" one "warm white" and one that was a combination of both. You could ramp up and down the light level in steps, but I always had them on full power. It also had a fan control to set the "power", this was always on full and you could tell that when the fan was on it was starved of current a little as the light would dim. If you turned the lamp off the fan would speed up! 
Anyway, the control system lasted about 2 weeks! I came to it one day and it had failed, I couldn't turn the lamp on and although I could run the fan I couldn't adjust it and randomly an LED in the controller was stuck on. I did really like it though, I liked being able to clamp it to my workbench and drag the lamp and extractor really close to work so I decided to try and fix it.

Pulling the controller apart and a bit of probing with a multi meter I realised that basically the control system made or broke the negative power rail and when the microcontroller was operational was probably PWM'ing the power to each circuit. I realised that I could quite simply wire in a switch for the fan and for the two LED light rings. I wasn't bothered about having both the LED lamps on at the same time. So a quick bit of soldering and then a small 3D print and I have a simple but working "controller" back on the lamp. I reattached the USB cable as I have lots of USB outlets and also it's nice that it can run off a battery pack if and when we get back to maker events or rocketry in fields! 

Tuesday, 23 March 2021

Ultimate Makers Case? Droneguard CS400


Recently I got around to building a 270mm "Robocat" quadcopter chassis I bought a few years ago that sat on the project pile. It's an interesting time to be building quadcopters that are going to weigh over 250g as now these require registration and insurance, both of which I have. However as a knock on it means that there are a lot of bargains around in terms of accessories for larger quads as people move towards lighter ones. Notably larger slightly older fpv cameras etc can be had for bargain prices. Another area where bargains abound is cases. As I have this up and flying I wanted to be able to store it and also walk it in to nice flying areas. Looking around for a suitable backpack and I came across the Lowe Alpine range of DroneGuard packs. The CS400 is a larger one in the range and a few years ago was a flagship case for them.


It's made from that kind of semi rigid material which wouldn't survive me standing on it but would survive a heavy bag being chucked on it or indeed being dropped a short distance. It has a stack of attachment points on the outside (similar to a molle system) and an outer slim pocket, not much can go in there, a phone maybe. Inside is where it gets interesting, all the internal panels and small bags can be removed and repositioned, the panels and bag have velcro that can adhere to any part of the internal case so it's very reconfigurable to its contents. 


In the lid side is a small thin - I'm going to call it a briefcase - which has an excellent organiser section on the front for holding small parts, tools and cables. This briefcase can be removed which leaves the lid to act as a great area for working in when in the field as it's steep sides mean you aren't going to lose a screw or clip in the grass. 


Whilst we have only walked around a km with this laden, it's pretty comfortable to wear as a rucksack, and the straps have a clever latch system that allow them to be removed. You can connect the straps together to make it more of a shoulder bag type carry. 


Finally, the best bit! Remember I said that these where a flagship product a few years ago? Well it seems the original RRP could be up at £130, I got this one online, brand new and delivered for £28. It should give good service for the quadcopter, but I can also imagine using it a lot for rocketry stuff and other maker events carrying all kinds of kit, well protected, into cool places. 

Thursday, 25 February 2021

New Rocketry CAD tools: FreeCAD Rocket Workbench


In my never ending quest to get more opensource stuff around rocketry going I posted over at the FreeCAD forum about a concept for a Rocketry themed workbench. It seemed like it would be a good fit and that it might be an interesting area for developers to work on. I explained how I'd often used Openrocket to design and simulate a rocket design and then, quite often, I found myself copying dimensions into FreeCAD or sometimes OpenSCAD to create 3D objects of nosecones, centring rings, fins and more. I suggested that automating some of this would be a good starting point, but that also the sky was the limit, ultimately it is *possible* to recreate something like Openrocket or Rocksim in FreeCAD, with the benefit then of any design is auto-magically in a CAD format for other techniques to be applied. FreeCAD already has a wealth of tools that can be leveraged at rocket parts, from 3D printing mesh tools, to CNC toolpath work, through snazzy computational fluid dynamics tools,  FEA and more. Hell, there'ss even a glider workbench for designing gliding parachutes within the community so the end really is limitless!

What happened next was utterly brilliant and testimony to opensource culture! People got interested and one chap, Dave,  (AKA DavesRocketShop ) got stuck in. Within a couple of weeks we now have a rocketry workbench released with some useful tools already up and running. Also there is a tantalising roadmap of exciting features to come. 

The first release when installed as a workbench gives you some parametric tools to create rocket air-frame components. Nosecones in all the common geometries are all there, Haack, VK, Ogive, Parabolic series, Power series etc. Transitions are similar in choices and there are tools to create body tubes, centring rings and bulkheads. It's really straight forward to begin to assemble great parts that can be adorned and edited using the entire suite of tools FreeCAD has to offer. Fins, in the first release, are limited to trapezoidal designs but there are a wealth of parameters to play with and it's trivial to auto generate aerofoil geometries etc.  The rocket workbench is already available via the addon manager which makes installation and updating a breeze and on the forum thread the mighty Dave is occasionally releasing manual install versions for those of us keen to try experimental features. 

Dave is currently working on importing parts from the openrocket databases. This is really interesting as all the common manufacturers parts are in there, so if you want a particular Estes replacement nosecone, or to upscale one for some crazy project this will be but a click away! I'm most excited about that there is a plan to allow the workbench to import Openrocket, Rocksim and RASAero files, whilst that may be some way off it really opens up some astonishing opportunities for rocket designers. Also having got to grips with the technical drawing workbench in FreeCAD I am looking forward to being able to document my designs well, important if one day I go for L3 HPR certification. 

Finally if you are new to FreeCAD but want to try FreeCAD I'm writing a reccurring series for Hackspace Magazine on FreeCAD and it started back in issue 37 here


Sunday, 7 February 2021

Cheap Small FPV Quadcopter Conversion


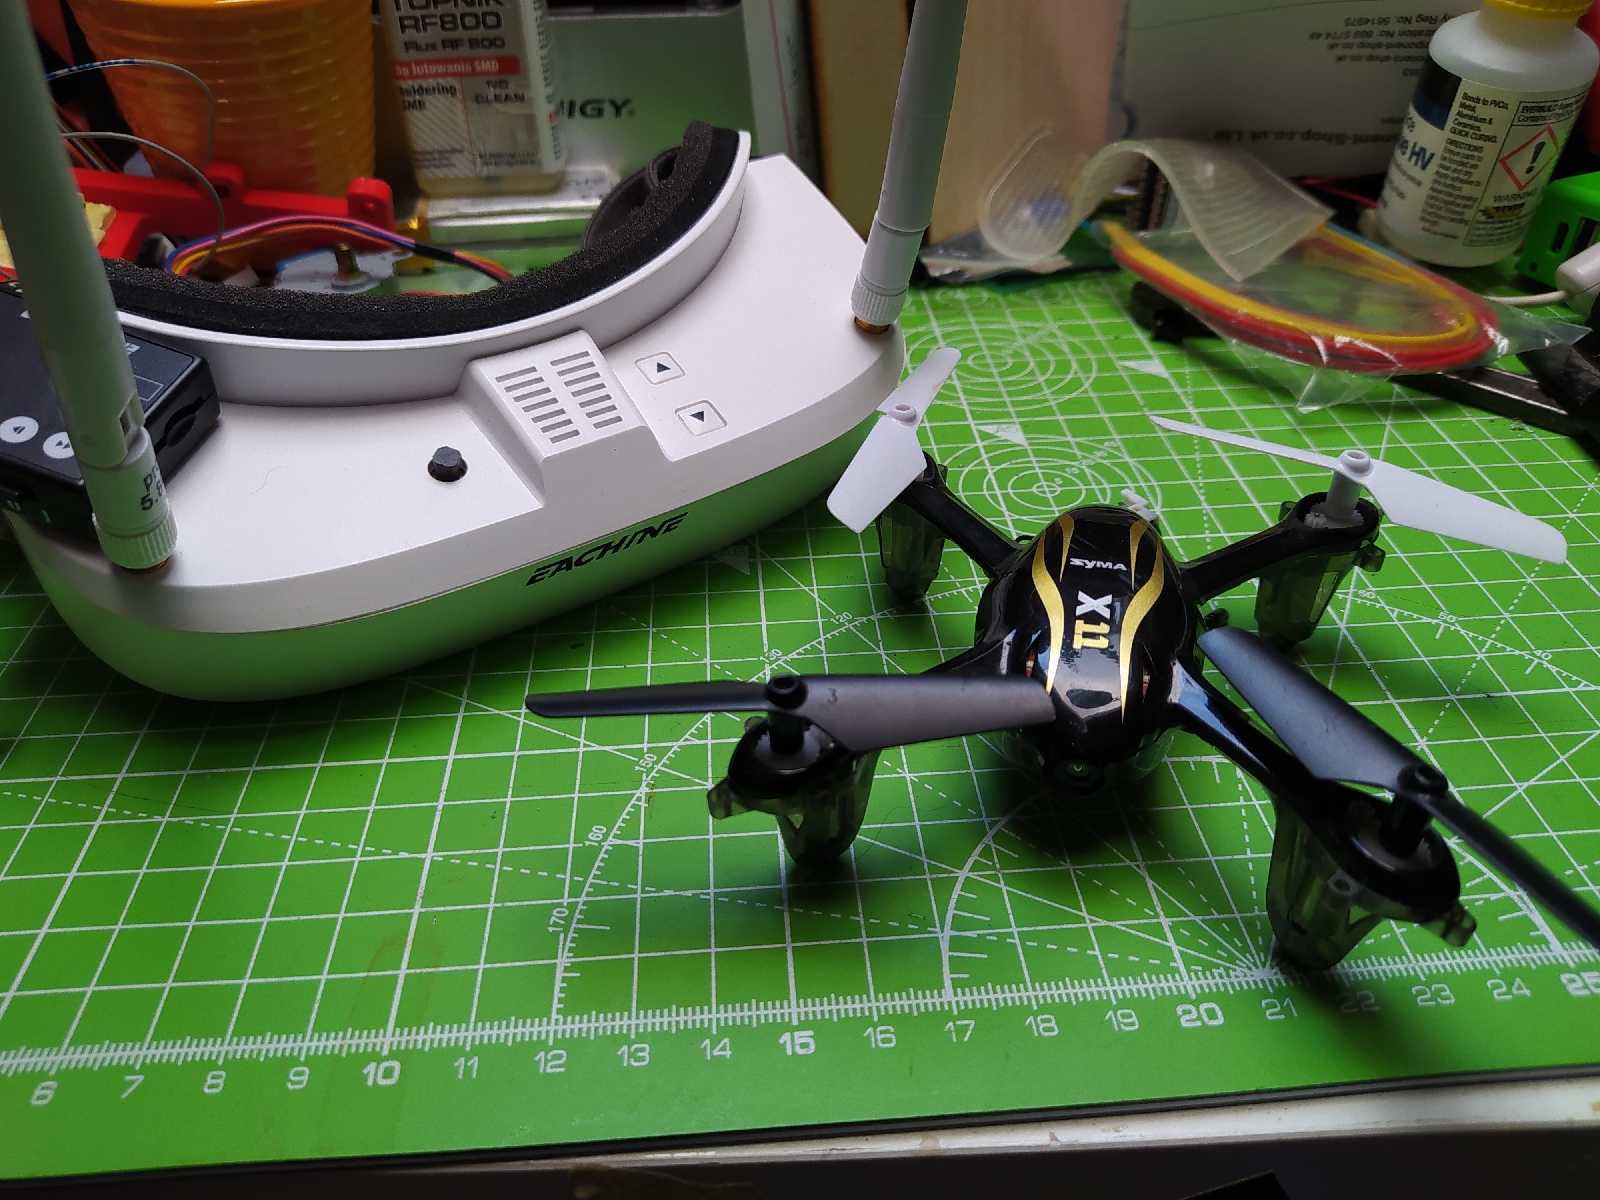
I've been getting back into a few long stalled projects including building up a Robocat 270 quadcopter kit I've had for ages on the build pile (will post on that soon). the reignited interest in quads has made me want to try and learn to fly First Person View (FPV). The Robocat needs a few line of sight flights before I commit to rigging it with FPV and so I wanted to learn on something smaller and cheaper. My very first quadcopter was this Syma X11 a small brushed drone that is a brilliant little stable flyer to learn on. There was a version sold with a camera (non FPV, 0.3 megapixel and micro SD) but all the Syma X11 bodies are the same and on mine there was a blanked off lens area and a void where the camera would be. I'd picked up a set of cheap Eachine goggles off eBay and so I bought a tiny Eachine TX06 split FPV camera and video transmitter (VTX).  As the X11 is a little airframe I am used to, and , as I felt I could get the TX06 rig in it, it felt a good option for a cheap small learner FPV setup.

Flipping the X11 over you can see the lens cover which was the target area for the camera. Undoing the 4 screws allows the lower body and the battery cage to be removed. 

The battery cage (the white piece) can then be removed with 4 small screws. I realised that the VTX would sit happily underneath the battery cage and that the small antenna could be pushed through the rectangular hole you can see at the back of the body shell on the left. On the white battery cage above I needed to snip of the square moulding seen at the front in the picture above. After removing the small fake lens in the body I snipped some plastic to widen out the hole for the camera. 


You can just make out in the image above that I've places a small piece of double sided pad between the camera and the battery frame and you can see the amount I have trimmed off the battery cage and the body on the right of the image. 


Powering the camera and VTX I simply trimmed the connector off the TX06 and soldered the wires onto the pads where the LiPo connects to to the board. I've managed to fold the wires out of the way and the battery slides into the battery cage as it did before. You can tell there's a little extra weight in flight, but it really isn't an issue as in stock form the X11 had a reasonable flight time. Now to get used to the wibbly wobbly world of FPV!