
If you fly a model rocket, or a kite how high up does it go? It’s a tough question to answer and you might think you’d need to add some expensive electronic sensors in the form of an altimeter to work it out. Whilst that might make a great electronics project in itself it’s quite complex and it might be easier to start with an excellent and accurate DIY tool for gauging heights.
The tool we are going to build is an “Inclinometer” so you might guess from the name that it measures inclines or angles. It’s basically a protractor but we will add a component or two to make it easier to take a measurement. We’ll also do some simple mathematics, or rather some trigonometry, which is a branch of mathematics that deals with angles. Don’t worry if this sounds hard, it’s not and we’ll step through what you need to do.
The DIY Inclinometer can be used to measure the height of anything you can see, the only other thing you will need to know is how far away you are from the base (or the point directly underneath) of the object.

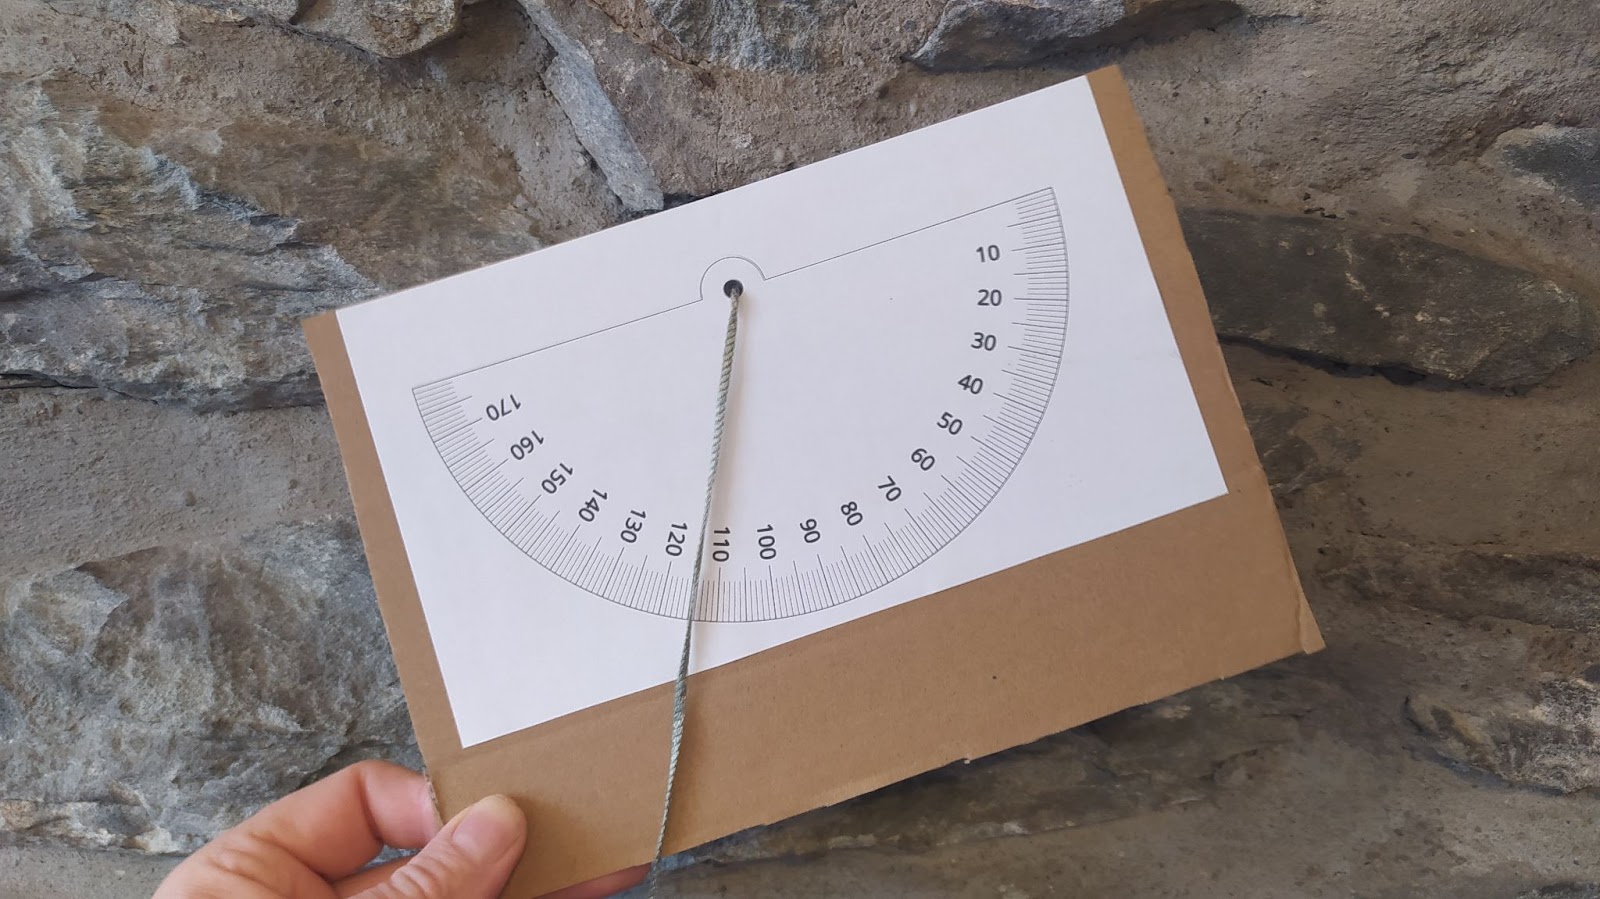
So let’s get started. If you print out this linked design onto a piece of paper you can then stick it to a piece of cardboard to make it a little tougher and more handleable. You can get fancy and trim the card to exactly match the printed protractor design or you can simply mount it on a larger piece of card of any shape. Make sure though if you mount it to a larger piece of card that the top edge of the card is parallel to the top edge of the protractor.
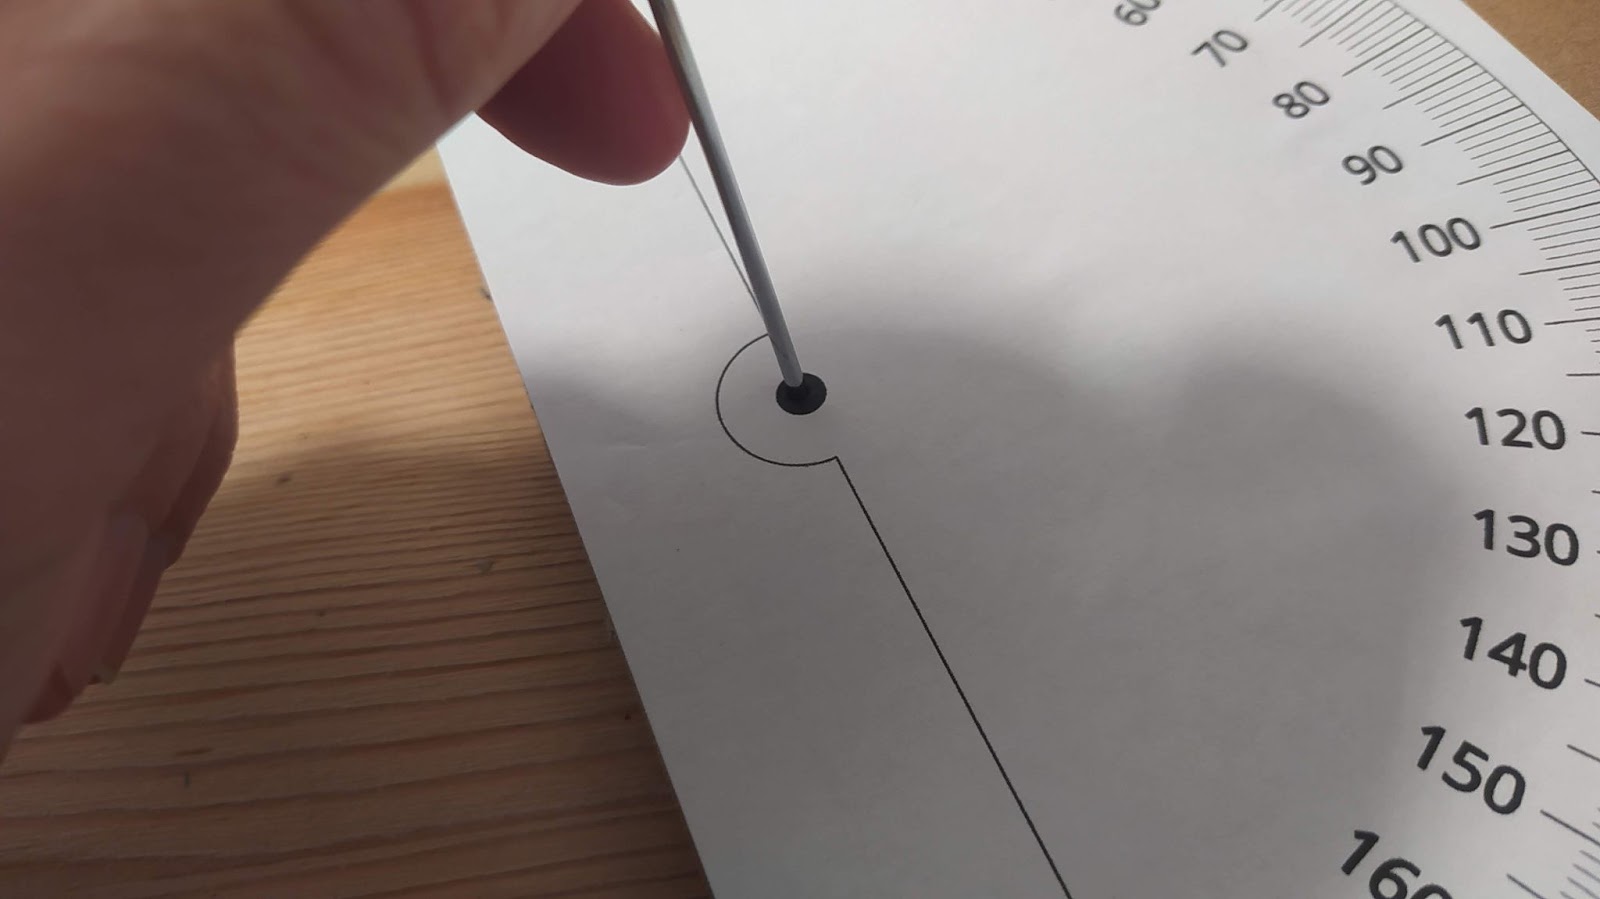
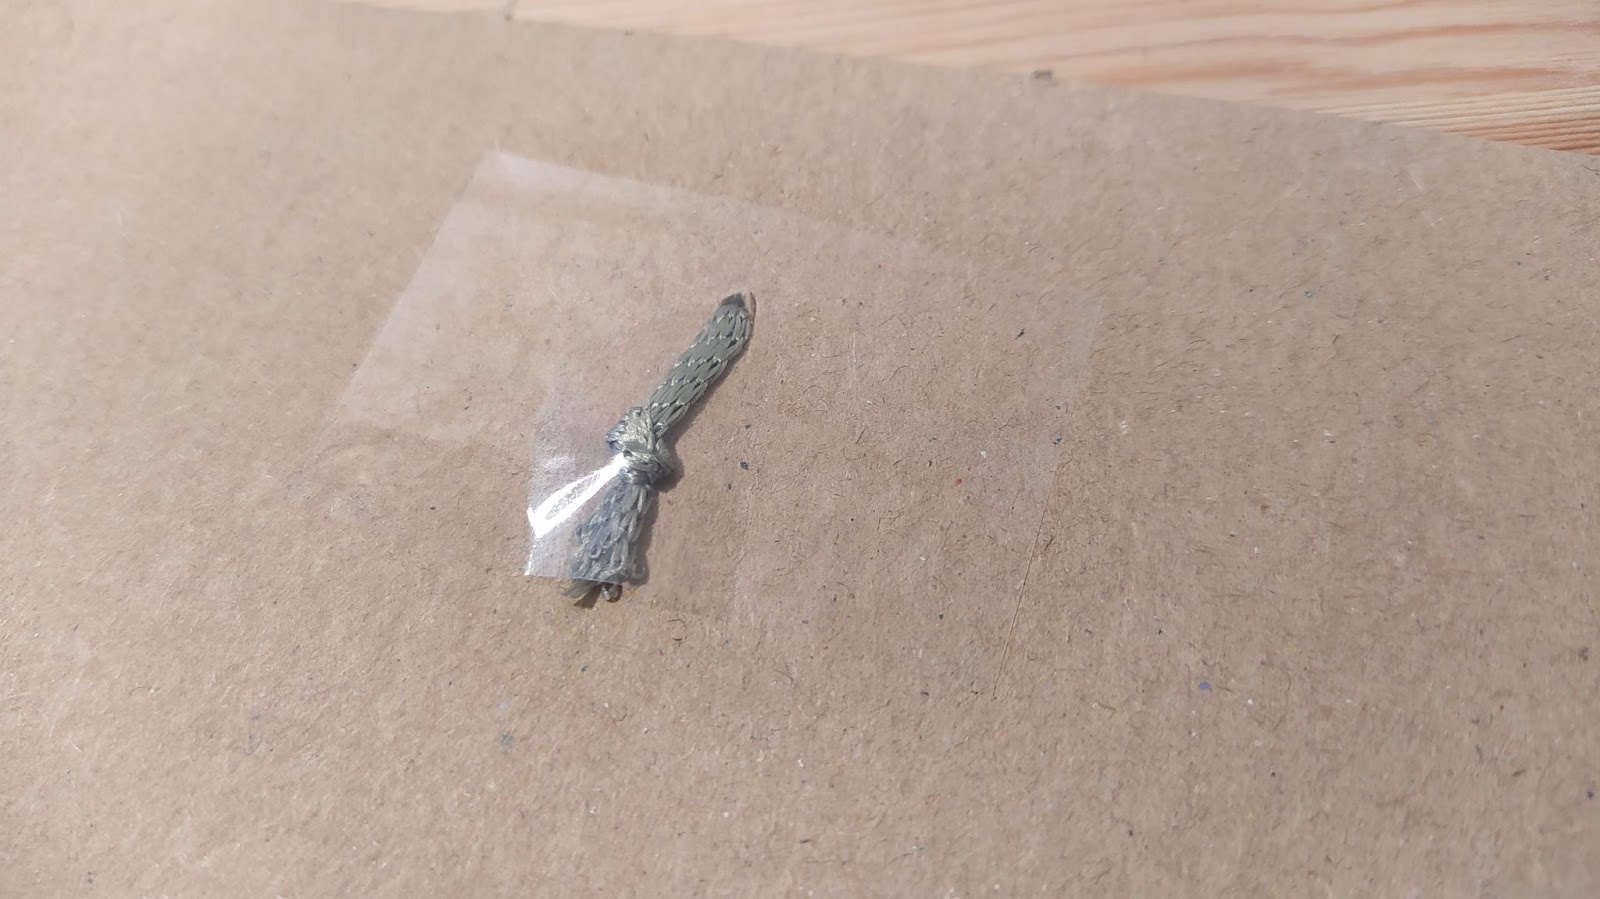
Next you need to make a hole through the little hole design in the protractor. A good tip to do this safely is to use a big blob of adhesive tac or modeling clay behind the protractor and then use a pointed object like a ball point pen or a knitting needle to poke a hole through. With your hole ready we now need to tie a piece of string to the hole that is long enough for it to hang over the protractor with a bit left over. Onto the other end of the string we need to attach something that can act as a small weight to keep the string straight. This can be a small metal nut or washer, or it could be a blob of the modeling clay you used earlier, anything will work.
Now that we have made our inclinometer we can use it to measure angles. If you hold up the protractor and look along the top edge of it you can aim it at the top of a building or other object. The weighted string will remain straight downwards and you can either have a friend read off the angle it reaches or you can trap the string once it’s lined up using your hand and then hold it in place whilst you move the inclinometer and take the reading.
So imagining we have just measured the angle of the inclinometer compared to a tree we could then walk from where we have taken the reading up to the tree and count our paces. If we know how long our pace roughly is, say 75cm, we can then work out the distance in meters. Of course you could do this more accurately, you could have a long string marked in meters to work out your distance, or, a modern approach is you could use the map application on your mobile telephone placing pins and reading the precise distance between them.
However you get your data, once you have your distance from the object or launch site, and the inclinometer angle reading you can work out the height of the object. To do so, maybe grab a pencil and some paper and make a little sketch.
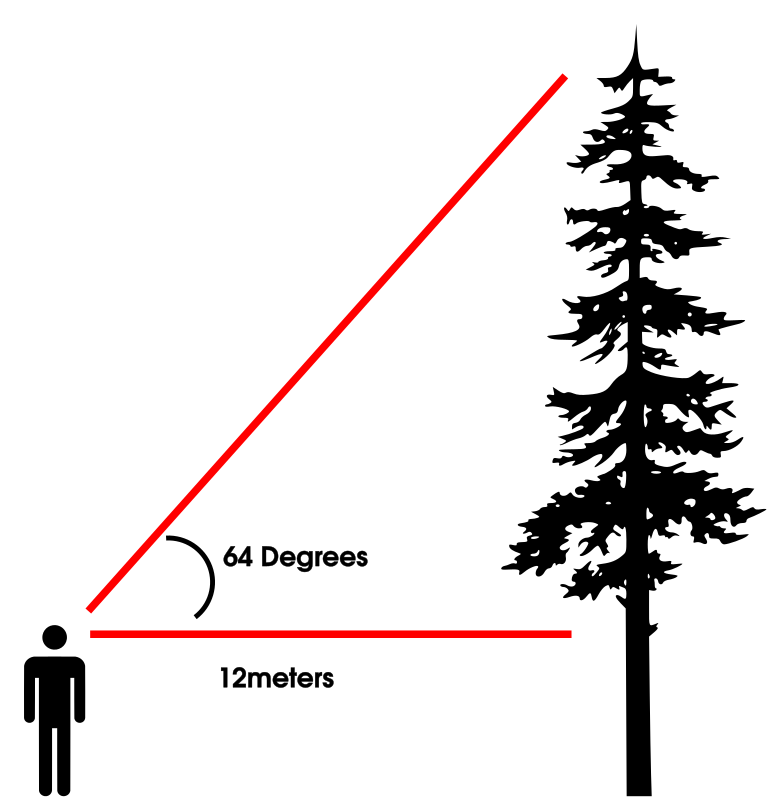
You can see in the image we have the tree and we’ve added the details of what we know and measured to the sketch. To find out the height we need to use a calculator, either a hand calculator or an app on your phone or computer. We’ll calculate the following.
ground distance * Tan(angle)
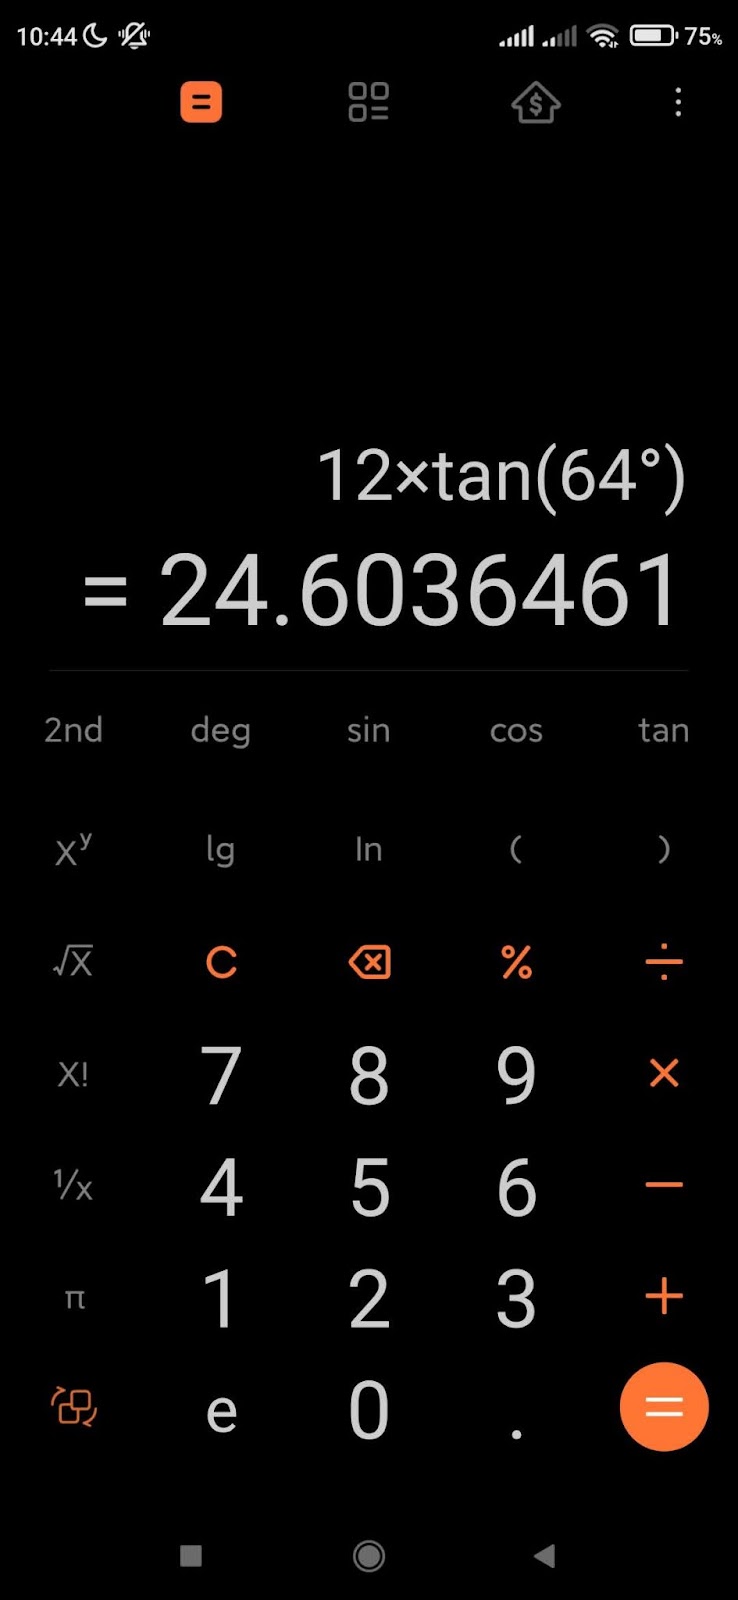
So if the distance to our tree base was 12 meters and the angle was 64 degrees then we can see that the height of the tree according to this calculation is 24.6 meters. However, can you spot a bit of an error? The calculation presumes that the angle reading is taken at ground level, whereas we actually take this reading at eye level. Adding distance from the ground to our eye level is needed to make this calculation a little more accurate. If I add my eye level height to this it makes this tree 26.4 meters tall.
It’s good to practice with stationary objects like trees and buildings, but you can also use this with moving or rising objects. If you are launching a kite for example you can ask your launch helper to hold the kite and then walk away spooling out a known amount of kite string to set the distance you are from the launch point. Then when you, or a friend, takes a reading of the kite later in flight you have all the data you need. If you are launching a model rocket, you can do something similar by measuring the distance between your inclinometer observation point and the launch pad of the model. With rockets it’s harder as you need to follow the rocket upwards as it moves very quickly and stop the inclinometer and trap the string at the point where it reaches its highest altitude. A good challenge!