Friday, 31 January 2020

Lathe tool height gauge, and the kindness of makers.


Whilst this isn't the most earth shattering of makes I wanted to post about about it as it was nice the way that it came about. So above in the picture is a little gauge I have made using a piece of clear acrylic, a couple of 3d printed blocks and a small piece of mirror. The clear acrylic has been marked using a sharp scriber held in the lathe chuck to mark the height of the centre line of the chuck. Many lathe tools require to be set as accurately as possible to centre height or a position relative to centre height. It can be hard to see around the toolpost and this little tool means that I can quickly shim a tool to the required height and I can look directly down into the tool and see the tool tip and the centre line in the mirror helping a quick and accurate cut. It can be used facing the tool tip or sat alongside the tool if the tool is at 90 degrees to the chuck face. 

I've had this on my to try list for ages but I never seemed able to find a piece of mirror the right size and I didn't want to buy a larger glass mirror and cut it down. Here is where the kindness of makers comes in, I saw a friend of mine on twitter talking about how well this plastic mirror material was cutting on his laser cutter, shamelessly I enquired if he had any scraps that a 30mm square could be made out of, luckily he had a 35mm length of scrap and was kind enough to cut me a few squares and post them up to me. Maker community rocks!


Wednesday, 22 January 2020

10 minute make; Laser-cut Polygon Box


A few of us at the Ffiws Makerspace have been talking and exploring the idea of laser-cut boxes and packaging for small products. Last night in a quiet 10 minutes I had a play with an online resource called templatemaker.nl which is an online generator that allows a user to put in some dimensions for a MASSIVE range of box types and it generates a file to download (it will create .pdf, .SVG or .dxf files). 


So I designed this little polygon box and downloaded an SVG file to open in Inkscape as I knew it would need a little editing for laser cutting. Basically, the file looks like the preview in the image above, you have a red outer line that needs cutting and some blue dashed lines that indicate the fold lines. If you wanted to print this onto cardstock and cut it out it would work well but I removed the blue dashed lines in Inkscape and changes the outer red line to a black 0.0254mm line so that it would cut on the laser. 


After cutting I used a ruler and a point to score the fold lines into the design and assembled it with some PVA glue (it would have been easier with Pritt stick probably for this thin card but it's all I had)!

The results are good, and I imagine if you cut a load and sat for an hour assembling them you would get quicker and more accurate in assembly. Of course, you could also use the lasercutter to add your logo or business details to the box design or personalise for a gift etc. Fun little 10 minute make for sure. 


Monday, 13 January 2020

10 minute make; Alpine Butterfly Knot


Knot tying is a great skill to practice and makes a superb #10MinuteMake. This knot "the Alpine Butterfly" is of interest to me as I use it to tie loops in lines to attach parachutes too for rocketry. It's a good knot mechanically as it can be loaded on the loop and on either side. It can be tied into the middle of a line and also can be used to isolate a damaged piece of line or rope by tying the damaged section into the loop. Really handy! I found this copyleft license-free image that shows how to tie them. 


Sunday, 12 January 2020

Machining Rocket Deployment Charge Wells.


Machined out these small aluminium charge wells for deployment charges for rocketry. I have used small copper plumbers endcaps before now but needed slightly more capacity and I  wanted to try and make them in a way that the E-match wires would sit flush through a small slot, making them easier to seal. As I use Pyrodex rather than BP it's important that the seal is good to contain the Pyrodex correctly. 


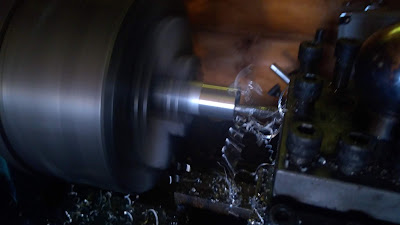
Machining them was pretty easy, I turned some stock down to 20mm diameter and centre drilled a 5mm hole for an M5 fixing (I potentially could have used smaller but I needed 5mm to give clearance for the home ground HSS boring bar). Then I bored them out to leave a 3mm wall thickness and parted them off on the lathe.


Having parted them off I decided that they were a little too long for my needs and I milled a couple of mm off each of them as there is no use carrying that weight if you don't need it! I then used a small endmill to mill the small slot.


It's nice to be able to try these ideas and I love machining parts for rockets... I mean I could just buy everything but where the fun in that! :)


Thursday, 9 January 2020

Upcycling Pallets for Vertical Gardening!


I'm always collecting pallets as they are a useful, often free, source of either wood for projects or, if a bit too far gone, can be split for kindling for the wood burner. I've seen loads of projects using and upcycling pallets and indeed I've seen a few variations of this project where you turn a pallet into a vertical planter for gardening. I'm no great gardener but do try and grow a small amount of veg each year more for fun than on any grand scale, but also bought veggies, especially salad greens are costly and usually come in loads of packaging. A vertical planter would be great for those short of space, which we aren't particularly, but we do suffer a lot with slugs and snails. It seems that a vertical system would be easier to defend from these critters by using some copper tape around the base, so I wanted to see if this works well this season.


To start with I looked through the few pallets I had and found a likely donor for the project. The above one seemed ok and had three feet that could be turned into planting areas at a reasonable spacing. One end had an extra reinforced bit which I considered removing for ascetic reasons but I'm not too worried what it looks like and wanted it to be as strong as possible to cope with the winds we get up here!


Making the planting areas is as simple as adding another plank to the sides of the legs to make a base. I did this with some other pallet timber, it's crudely done with just nails, I didn't even make any measurements but rather nailed on an oversized plank and then cut it flush at the edges. Inside the planting area, the planks weren't wide enough to completely span the base so there is a 10mm gap or so either side, this is better as it will act as drainage for each level but once the planters are lined with gardeners membrane they will still hold soil well.

Many people build these and screw the planter directly to a fence or a wall, I decided I wanted to have this more mobile so I can experiment with placing it in different parts of the garden at different times of the year.  I found some scrap timber and made 2 wide feet and screwed them onto each side to make it free-standing. 

Above is the completed structure and I decided to give it a coating of wood preservative to try and make it last a year or two longer in the weather. I dragged it into the porch and gave it a slapdash coat before stapling in some weed membrane to finish off the planting sections.

Its been a fun, quick project and I'll be filling it with soil and sewing some salad greens and other bits and bobs in it at some point, I'll repost hopefully later in the year with it brimming with life!