Sunday, 14 March 2010

Warm Data release DAT 017 Data Acquisition

DAT017 VIDEO PROMO from Warm Data on Vimeo.


A mighty fine video for a mighty release from the ever productive Warm Data lot (OK I know... I'm a bit biased!)

Listen to and purchase if you can from these places

peoplesmusicstore

digital-tunes

Stay tuned for DAT 018 "Data Protection" featuring one of my tracks.

/Advert

Saturday, 27 February 2010

Gameboy Camera and Windows XP


When I started getting into gameboy/chiptune stuff I took the classic beginners route of buying an old gameboy and a gameboy camera...due to the fact that the gb camera has a nifty little sequencer application within it..trippy h.

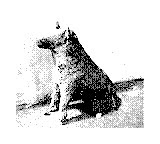
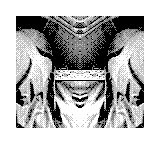
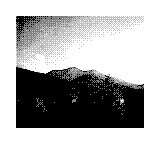
I quite quickly got interested in the images that the gb camera can take..with its low resolution and 4shade greyscale the images it produces can be quite mysterious. Combine this with the strange "trick" lenses (mirrors and panoramas etc) some strange effects can be had.

One problem quite quickly presents itself...how to transfer the images onto a computer. Many people have scanned the actual gameboy screen..which can produce good results, others have used supergameboys which allow gameboy games to be played on a snes console, you can then use a video capture device to capture images from the camera. The only commercial device that was ever marketed for connecting the gbcamera to a computer is the Mad Catz cable which connect between a parrallel port and the link port of a gameboy colour. I have found these Mad Catz cables to be pretty unreliable and indeed I couldn't get it to work on any of my older laptops that still have a parallel port...I'd also read that these cable don't work with XP....annoyed my cable sat under my desk for a year!

I then realised my desktop had a parrallel port and that it must be worth a try..eventually I got it working...reliably...BUT...you have to reinstall the Mad Catz software each time you want to have a session capturing camera images...better than nothing I suppose!

Here is how I got it working this is based on numerous forum posts and collected stuff from around the tinterweb,

Turn on your PC and hold down whatever key you need that takes you into BIOS (f2 is coommon)

In Bios find your parrallel port settings (under "advanced" tab possibly) set your Parrallel port to "EPP" and make a note of the IO Range (mine was 0378)

Save changes and boot

Download this

Install the Mad Catz software but don't run the software yet

Unzip all the contents of the Porttalk folder you downloaded into the Mad Catz folder that was created when you installed the software...this would be something like C:\Program Files\Mad Catz\Camera Link Software\

Then open a command prompt..click start, run and then type "cmd" and hit enter

In the command prompt you need to move into the directory you just placed the porttalk stuff in by typing;

CD C:\Program Files\Mad Catz\Camera Link Software\

then hit enter

then type;

AllowIO cls.exe 0x378

Note the last bit of that statement "0x378" that refers to the IO Range we noted before so change this to the value that you noted from your machines BIOS placing an x after the first digit.

Then open the Mad Catz software, it will ask you to set the range for your parrallel port so select the number that matches your IOrange again...it will then ask you to select a paint program to edit the images, you can select one or cancel this.

You should then be able to download your images.(you need to read the gb camera instructions on how this works! basically you select a image in album and print it from the gameboy)..but unfortunately I have had to go through this proccess every time I want to download images as it only works for one session...not to bad if you have one or more gb cameras full of images ..but a bit of a pain if its for just one picture!

Sunday, 24 January 2010

Replace Ram battery Resurrection...Yamaha DX11


I got given this synth a while ago (thats right for free!) in a non working state...when I turned it on it proclaimed on its little LCD "cng ram bat"..so thats what I did. I've had to do this on a couple of old bits of kit in my arsenal now and invariably when you find the ram backup battery it is soldered to the pcb via solder tags that are spot welded to the battery..no exception in this case (see pic below). It's sometimes hard to find the required battery with the solder tags welded on so most of the time a better option is to wire a small battery holder to the original pcb points that can hold a comparable battery.


So this battery is a cr2032 which is pretty common but I've still soldered in a battery holder so that in ten years time when I need to do this again I can just clip a battery in without breaking out the soldering iron. For those who may need to do this job in the future and stumble here...it's not immediately apparent where the ram battery is once you get the back off of this synth...this picture shows the board (big green tick) and the corner (green spot) where it is..you need to remove the six screws holding this board to the frame and I found I didn't have to undo all the connectors to the board just the one labelled "cnd1"..that allowed me to lift the board to a workable angle


That last pic shows how I attached a couple of short leads to the points where I'd removed the old battery and connected the new battery holder (actually one I'de scavenged from an old computer motherboard.. most of these use cr2032 to backup the bios ram in battery holders) I taped this into a little space I found so it wouldn't rattle and then put it all back together.

Then I've got nothing else done apart from playing around with it all afternoon! It's a great synth..people overlook them as they are interested in the DX7 which has 6 operators instead of the DX11's 4 but then the DX11 has 6 different waveforms available for each operator (the DX7 only has sin waves) so it's a pretty even match in my humble opinion and can with experimentation create some glorious digital fm goodness.

Monday, 11 January 2010

Native GBA tracking.... M4Gtracker


As yet unreleased in alpha stages...I've been playing with the alphas of this new tracker, M4Gtracker. It's being built by an absolute hero called Smiker...the work this guy is putting in is amazing with new alpha's peppering the last few days. Check the video above where he shows off the fm synth (stick with it sound begins around the 1 minute marker) and read more about it here.

It's definately worth following the progress and if you have a gba and a flashcart or an emulator give the alpha's a whirl.

Sunday, 10 January 2010

DIY Binaural Mics


My good friend Lungwah regularly uses in ear binaural mics and I've always dug the sound he achieves in his field recordings. Having recently got a boss micro br portable 4track recorder I wanted to not only use it as a 4track but, as it can record straight to wav or mp3, as a field recorder too.

So I've made my own binaural mics...its a really simple job. I found a couple of electret mic elements (I had a pair in one of my many scraps boxes but you could buy them here for example) and an old pair of earbuds that are large enough to house the mic elements. Simply crack the earbud cases open, desolder the headphone elements, work out which wire is signal and which is ground and then solder in your mic elements.
Most electret mic elements have 2 solder blobs on the back, one for ground and one for signal, the way to tell which is which is that the ground contact will have a trace going out to the case of the element. If you click the link above these are visible on the picture.

The earbuds I used had a small vent from inside to the exterior of the case anyway but I made it bigger to expose more of the mic element, you can see this in the picture just above the classy gold bands! I then used a spot of hot glue to hold the elements in place and reaassembled the earbud cases. I was done in about 10 minutes.

I'm pleased with the sound results from these and enjoy the fact that you can be doing a field recording and yet not draw any attention as you are only wearing earbuds....which happily had a L and R on them so I even manage to get them in the right ear!

EDIT...
I was asked in comments to upload a sample recording...here we are
<a href="http://concretedog.bandcamp.com/track/diy-binaural-mics-walking-in-lunch-hour">DIY Binaural Mics...walking in lunch hour by concretedog</a>
It's not the wildest thing I've ever uploaded, it's me just walking for a couple of minutes from my office door into town..highlights include, a pram wheeling beside me, cars passing, a phone ringing in a garage and some seagulls! It's recorded on the hifi (compressed setting) on the micro br, then exported on the unit as a mp3 transferred to computer for trimming and converting into wav (for bandcamp). I think you get a good idea of the soundscape if you listen to this through headphones.

Tuesday, 29 December 2009

Merry Gristlemas


A very fine gift from my lovely partner...a Gristleism...

The Gristleism is a piece by Throbbing Gristle & Christiaan Virant and is a small box beautifully packaged that is a loop player containing 13 throbbing gristle loops with a volume control and a pitch bend. The loops are all experimental sounds some with a pulse others more droning and some more noise based...its a fascinating piece to play with...I think it may be the pre show music if I ever do a solo experimental gig.

Find out more about the gristleism here

or jump straight to the video of 3 of them performing together here

Saturday, 7 November 2009

CELLS


I've been playing with this synth that I made for the No Label event photo'd above about a million years ago! It makes strange drones that sound delayed and looped (although it has no delay or loop just a looooooong release stage and lfo) and is designed to be fiddled with rather than played or sequenced. At the time I made this I had the idea of creating a pendrive full of little applications that could provide possible sound or sample inspiration played only by the pc keyboard and mouse. I was also into the idea of really clean looking Gui so much so that nothing on this synth is labelled until you click the tiny "?" in the bottom left hand corner..then an overlay appears with all the labels...I'm pleaed with the fact that in this view you can still manipulate all the knobs and stuff through the overlay.


Anyway I'm releasing it into the wild... although before I do I should say that I don't plan to do any updates or mend anything or do any development of this...please watch your volumes (it launches with the volumes low) as it can get pretty loud. The download is a zip file including the application, a read me (contains some instructions) and two little dat files that it generates in any folder you copy it too so don't worry if you lose those. It should run on anything win xp and above and can run from any drive so pendrives, memory cards or internal drives....here you go

concretedog CELLS

You can use or distribute this in any way you want...if you create something with it please let me know.