I feel pretty lucky, I work hard and have to hustle but I get to work and write about stuff that I really enjoy and sometimes wonderful things happen! A couple of weeks ago I was discussing the new Creality Ender 2 Pro with
@Woodpunk who had been a great advocate for the original Ender 2 as a cheap small from factor printer for farming. Particularly towards the end of their commercial life the Ender 2 was often to be found for under £100. Mr Woodpunk was considering getting the new ender 2 pro out of curiosity but in a fit of unbridled wonderfulness he decided instead to send me one to outsource the research to me!
So I see the Ender 2 Pro retailing in the UK at between £140 and £170 (the lower price being from
technology outlet who I have bought off previously and had good service) and it arrives extremely well packaged with all tools and decent instructions for the pretty straight forward assembly.
It went together in about 20 minutes and only really needed 7 bolts inserting and tightening up and a few well labelled cables connecting up. It's a smart looking unit with a carry handle on the top of the Z axis tower for portability and the rather nice filament spool holder rotates in and out for a stowed and deployed position. It does make it pretty small if you want to put it away and not have it permanently taking up desk space or if you need to carry it elsewhere.
On this unit I found all the belts to be at a decent tension and all the vee wheels running smoothly with no play and it didn't need any tweaks mechanically apart from setting up and levelling the heated bed. I'm spoilt these days by my Prusa Mini + (
which I reviewed in Hackspace Magazine Issue 53 ) which has the automatic bed probing and compensation but in a way setting up and levelling a print bed is a better solution as you aren't forcing a compensation in the build rather getting it right from the start! The bed has large turn wheels fitted and it's pretty straightforward to level using a piece of paper for a feeler gauge. Better than my first printer, the Wanhao I3 V2 you can see in the background which had no wheels fitted and where the first item I had to print! Whilst I could add a probe in the future, I only had to level the bed twice on setup after thermally cycling it and haven't had to tweak it so I doubt I would add one.
I've LOVED the removable print surface on my Prusa, and it's great to see that budget end machines are starting to include this. The print surface on the Ender 2 Pro is very good in terms of print adhesion and release and it works very well. A minor gripe is that it's incredibly flexible and the magnetic bed grabs it a little well making it hard to line up before the bed grabs it, but really that's a tiny tiny concern.
The LCD display clips on and is easy to read with a familiar Marlin firmware. Whilst again after using a prusa mini + with it's snazzy 32bit controller and hi res display this feels a little low tech it's absolutely fit for purpose, responsive and easy to read.
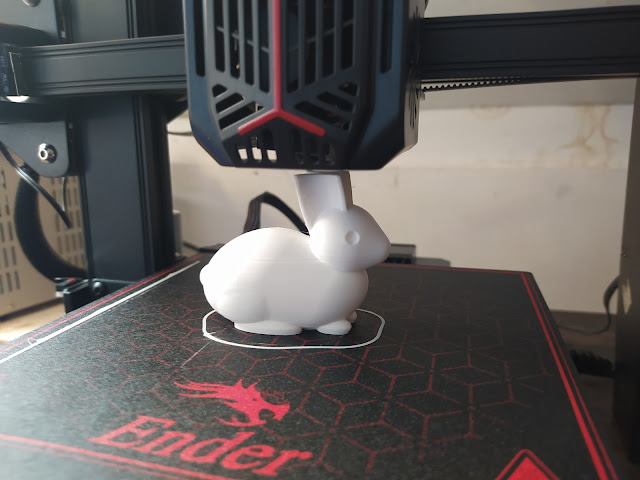
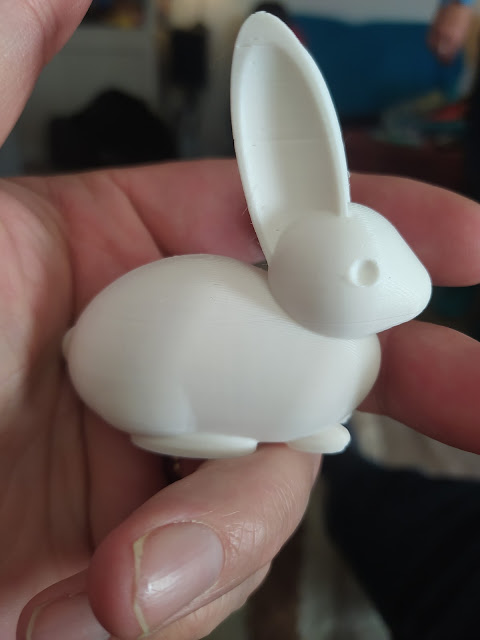
The included micro SD card has some documentation, some windows software and the obligatory example file gcode for printing. Loading up the sample creality PLA and setting it off it produced a very nice bunny model albeit with a noticable Z seam on the reverse side. Print quality was amazing though apart from that and it felt like a very good start.
I haven't used the Cura profile provided for slicing as I am a fan of PrusaSlicer now and I was pleased to see that there is a beta configuration for the Ender 2 Pro included in the latest version. I tinkered with a few prints using the default settings of the PrusaSlicer ender 2 pro profile and initially had reasonable result but with constant blobbing/zits at new layer start points. The ender 2 pro is a bowden set up and it's quite a short bowden tube which means that there is quite a lot of pressure in the hot end. I knew I needed to up the retraction amount and speed but initially this seemed to make little difference. I was puzzled but began to suspect that the included SD card wasn't particularly quick and that the machine seemed to be making some longer pauses at layer change than I expected. I grabbed a better brand micro SD and tried again, this, combined with what seem astronomically high retraction distances (6-8mm) and near light speed retraction rates.. (200mm/s plus!) the blobbing and oozing was cured. So far it's had trials with a variety of PLA and some nice Prusament PETG as well as some cheap generic PETG. It's handled it all very well.

In conclusion I'd say this is a great printer for the price, although there are a lot of great printers around the £140 to £200 mark these days. It is certainly capable of producing good prints straight out of the box and it has some nice support and user communities building around it already. I can only imagine making 2 changes to this machine. The first is, this is an incredibly quiet printer.. ruined by one fan in the power supply... honestly this is such a shame as the fans on the hotend and the steppers are incredibly quiet for a budget printer but the cheap fan in the integrated power supply is really loud, Creality really missed a trick there as an extra dollar or two on that fan component and people would be amazed how quiet this thing can print. Secondly, I don't like the fact that the top of the Z axis lead screw is floating... it seems like with all the handle assembly up there they could have popped a bearing in that could support the end of the screw. I can't say I've had any problems though with taller prints so it's only really an issue in my own mind!
So there we go. It's an excellent printer. It's definitely going to get used and it's probably going to get abused with weird filaments and experiments as, at the price point, it's a great printer to not be too precious about.


No comments:
Post a Comment